Server Settings
The server settings are used to modify a number of different features for your custom experience. They are particularly useful in enriching the custom server, catering to your needs to shape a desired experience for you or your players (or both!).
Server Tab
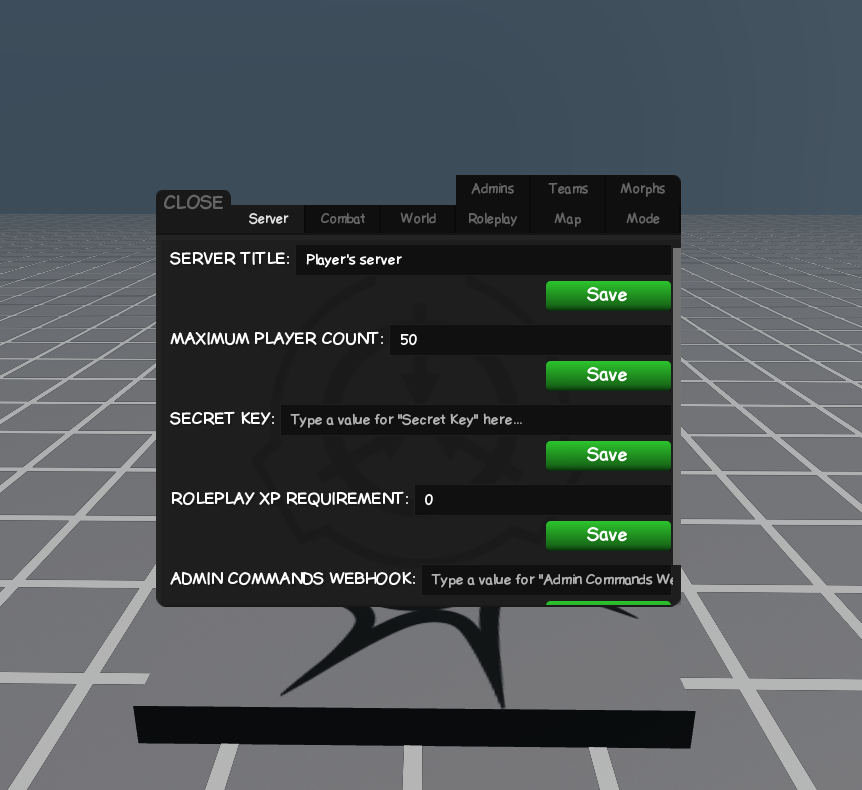
The server tab is important when starting your custom server. Here you will be able to configure some of the most important settings:
| Setting | Description |
|---|---|
Server Title |
Change your server name. |
Maximum Player Count |
Set the max number of players that can join your server. |
Secret Key |
Makes your server private and only joinable with a password. |
Roleplay XP Requirement |
Set the minimum amount of XP a player needs to join your server. |
Admin Commands Webhook |
Log your server commands to a Discord channel via a webhook.
|
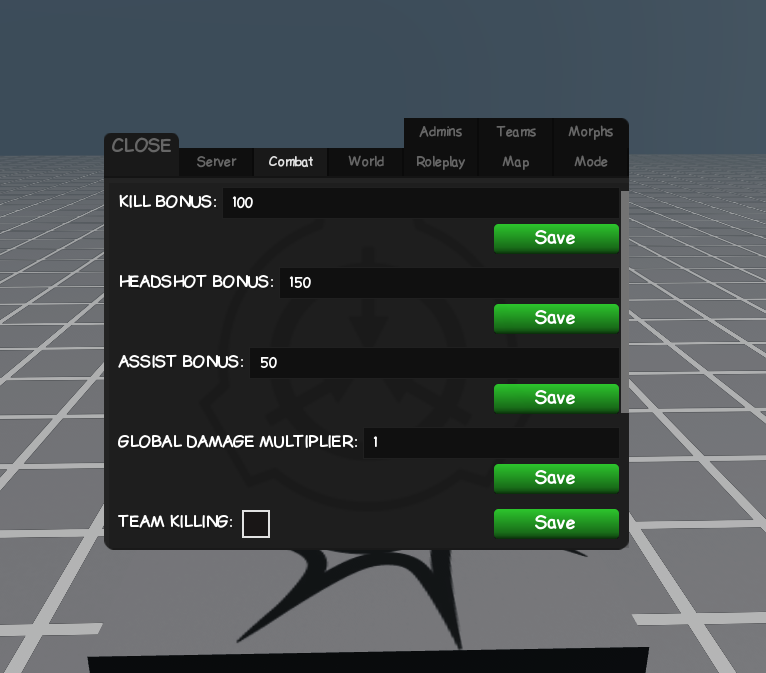
Combat Tab
| Setting | Description |
|---|---|
Kill/Headshot/Assist Bonus |
Set the amount of points awarded for each action. |
Global Damage Multiplier |
Increase the damage dealt by all players. |
Team Killing |
Allows players on the same team to terminate each other (friendly fire). |
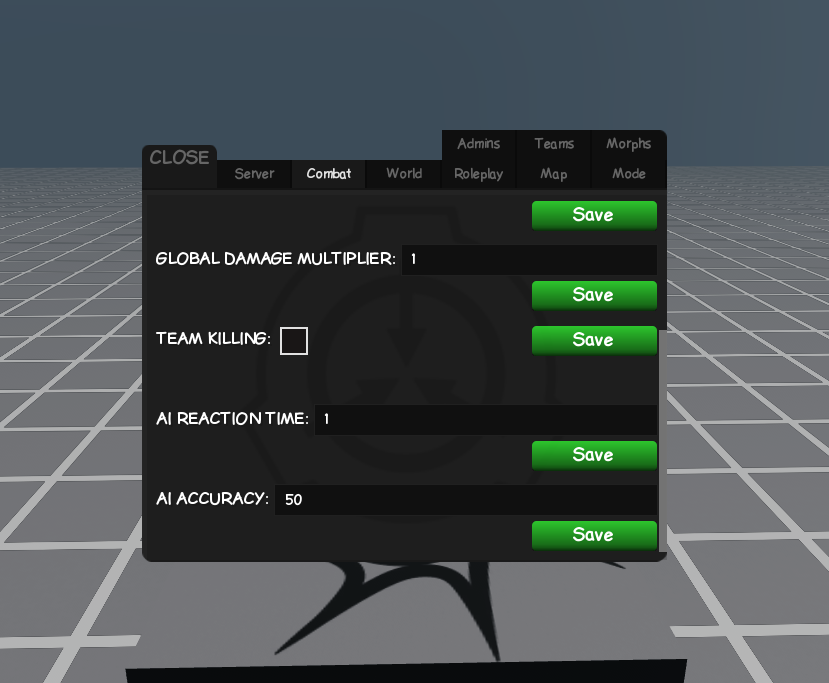
AI Reaction Time |
Modify the time it takes for AI (combat, zombies, etc.) to react. |
AI Accuracy |
Modify the accuracy of combat AI. |
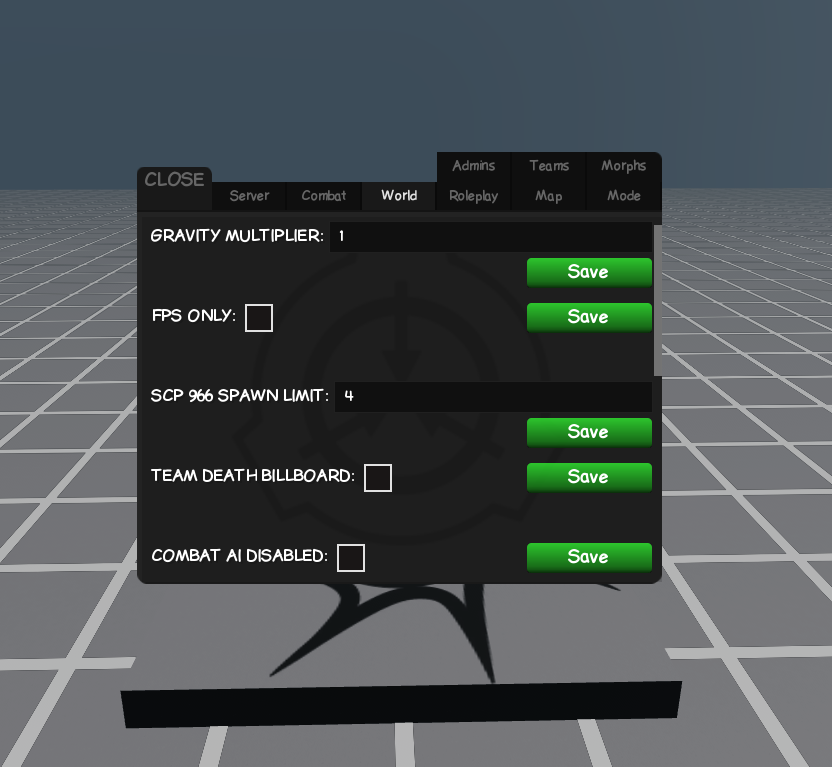
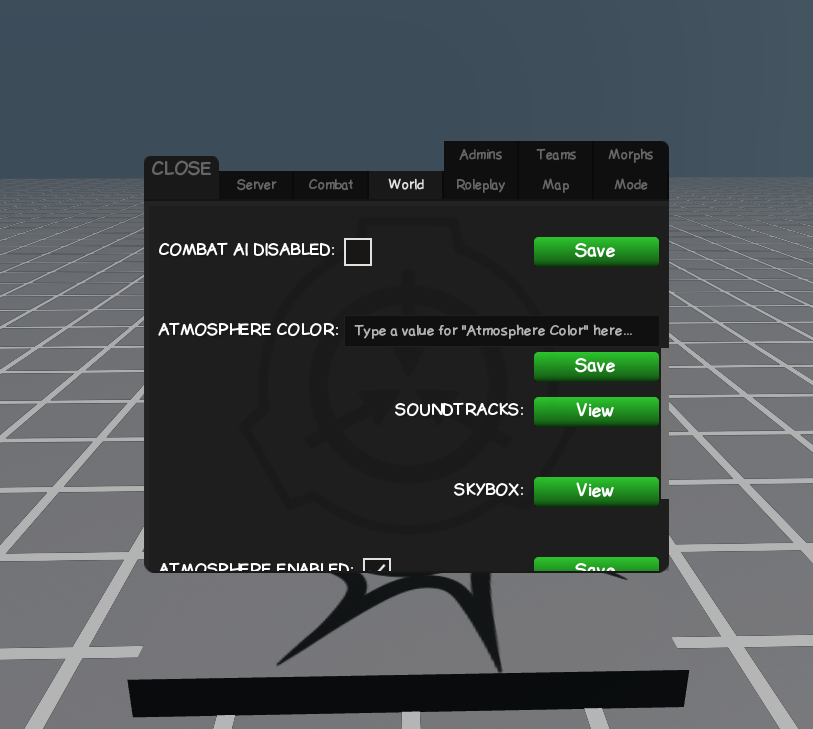
World Tab
| Setting | Description |
|---|---|
Gravity Multiplier |
Modify the gravity for all players. |
FPS Only |
Forces all players to be in first-person mode. |
Atmosphere Color |
Change the atmosphere color using RGB (e.g., 0 0 255) or HEX (e.g., #66ffff). |
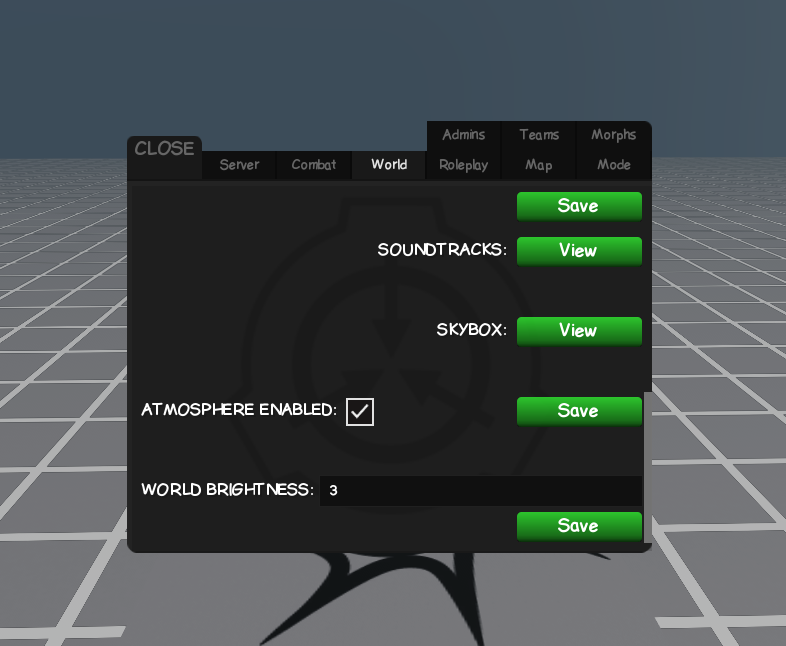
Soundtracks |
Set the server soundtracks to play. Use :songs command or provide your own audio IDs. |
Skybox |
Change the skybox by using an image/decal ID. |
World Brightness |
Adjust the overall brightness of the server, primarily affecting outdoor areas. |
SCP 966 Spawn Limit |
Set a limit of how many 966 (ghosts) can spawn if SCP 966 is spawned. |
Team Death Billboard |
Displays a death billboard for teams. |
Combat AI Disabled |
Combat AIs will not engage if disabled. |
Atmosphere Enabled |
Enable or disable the atmosphere. |
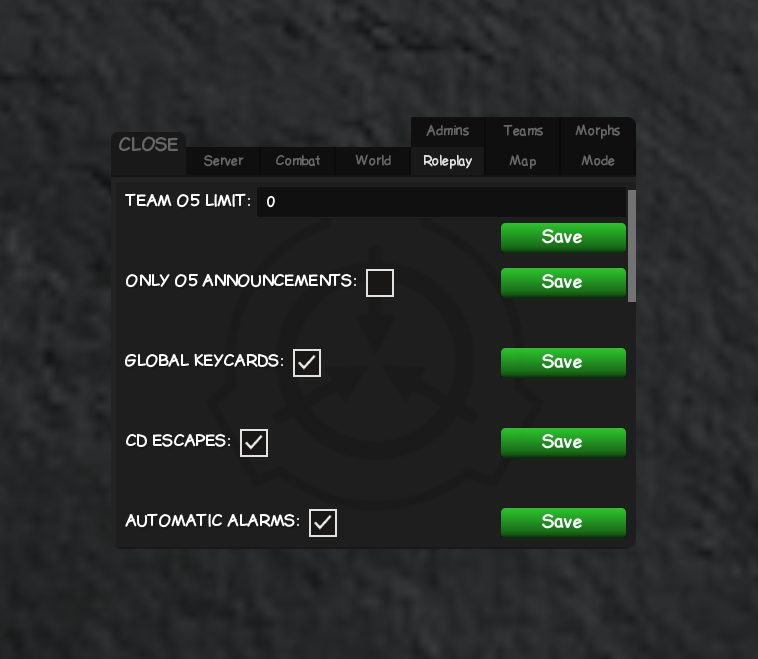
Roleplay Tab Roleplay Mode Only
| Setting | Description |
|---|---|
Team O5 Limit |
Set the maximum number of O5 players allowed. |
Only O5 Announcements |
If enabled, only O5 members can make global announcements. |
Global Keycards |
If enabled, players will spawn with their default team keycard. |
CD Escapes |
Enable or disable Class-D escape routes (helipad, CI base, etc. on default map). |
Automatic Alarms |
If disabled, alarms must be triggered manually by players. |
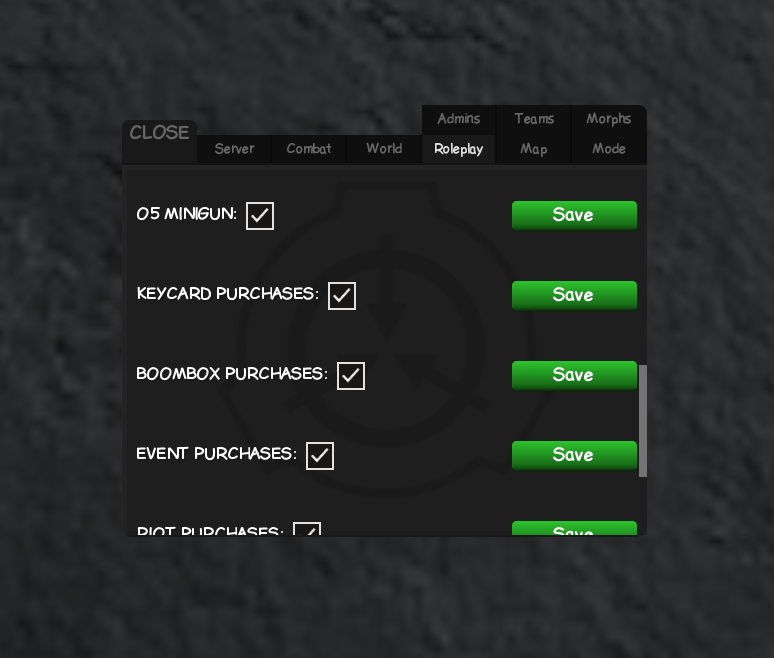
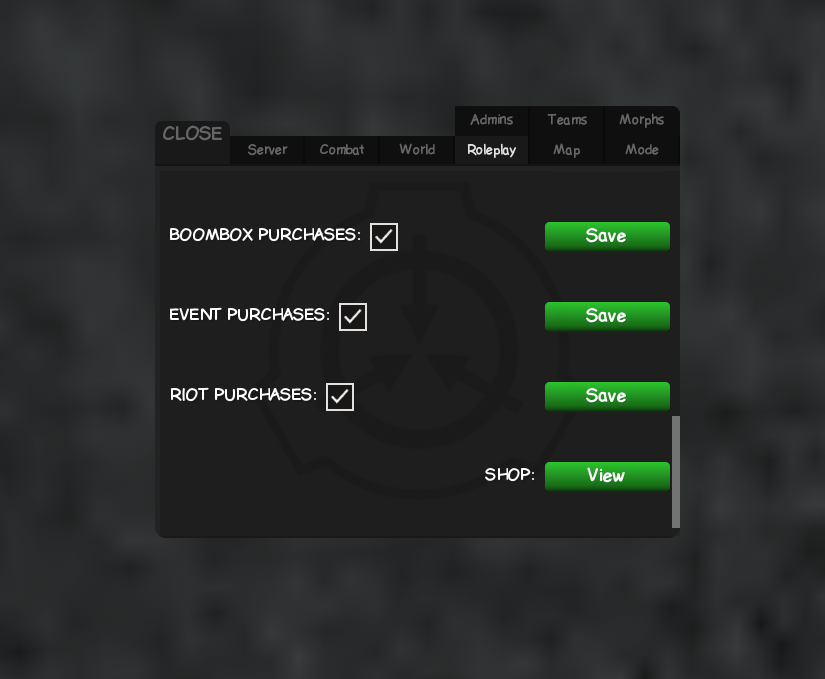
Purchases |
Enable or disable various player purchases (Keycards, Boombox, Events, Riots). |
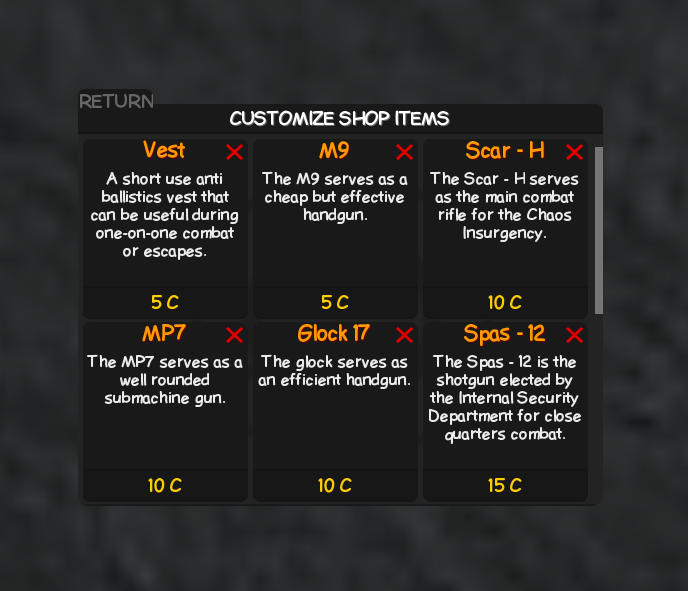
Shop |
Customize the items, availability, and prices in the Alex/Jerry shop. |
O5 Minigun |
Enable or disable if O5 spawn with minigun. |
Keycard Purchases |
Enable or disable if players can purchase a keycard for doors. |
Boombox Purchases |
Enable or disable if players can buy a boombox. |
Event Purchases |
Enable or disable if players can purchase events like Nuke, Able, Lizard, Boombox Party. |
Riot Purchases |
Enable or disable if players can purchase riots. |
Prestige Tag |
Enable or disable players' prestige tag. On by default. |
Access Level Tag |
Enable or disable players' access level tag. Off by default. |
Admin Tab
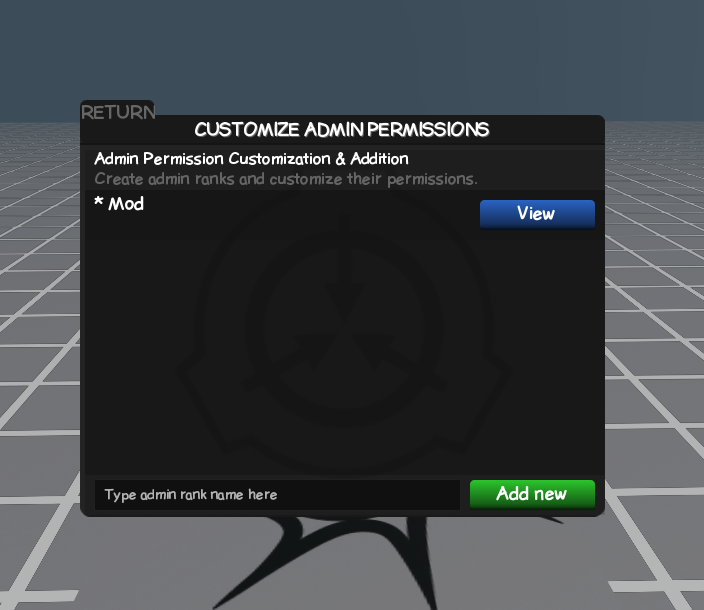
With the Admin tab, you can create custom admin ranks with specific names, authority levels, and command permissions. We will walk you through the process.
How do I make a rank?
To create a rank named "Morpher", type the following into the input box:
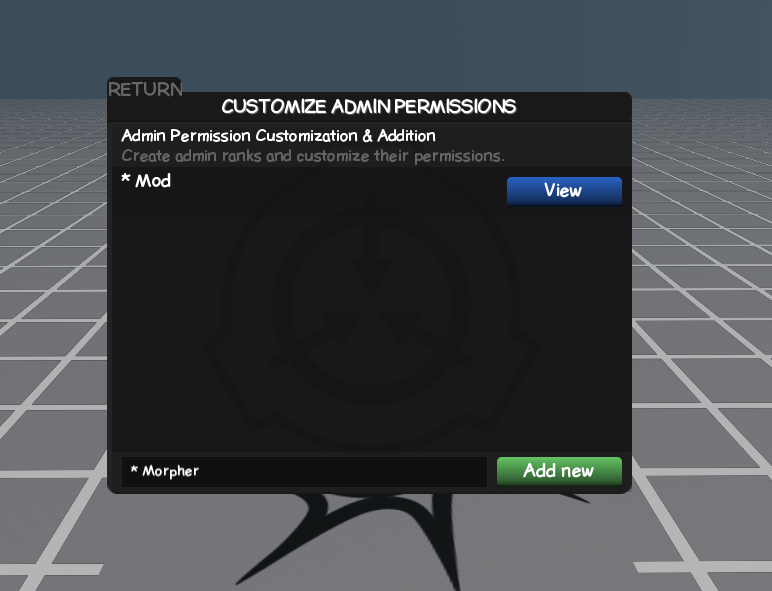
* Morpher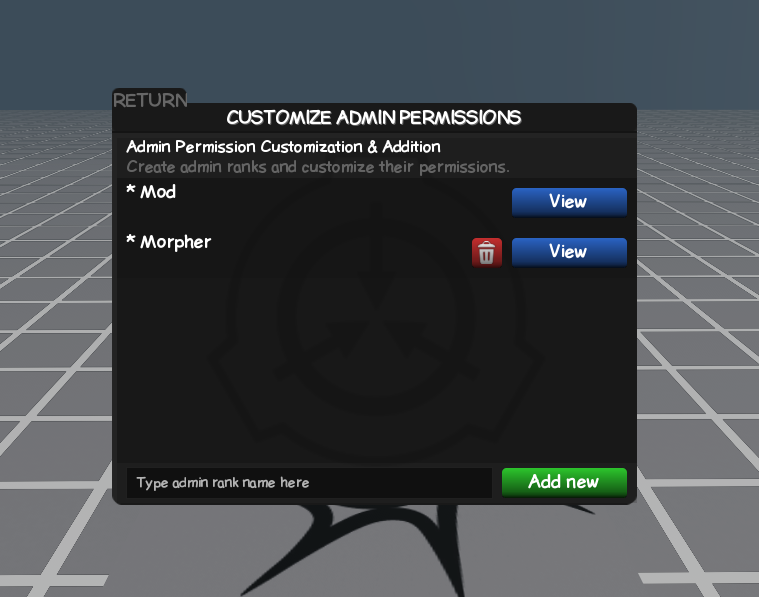
After typing, click Add New. To edit the new rank's permissions, click View.
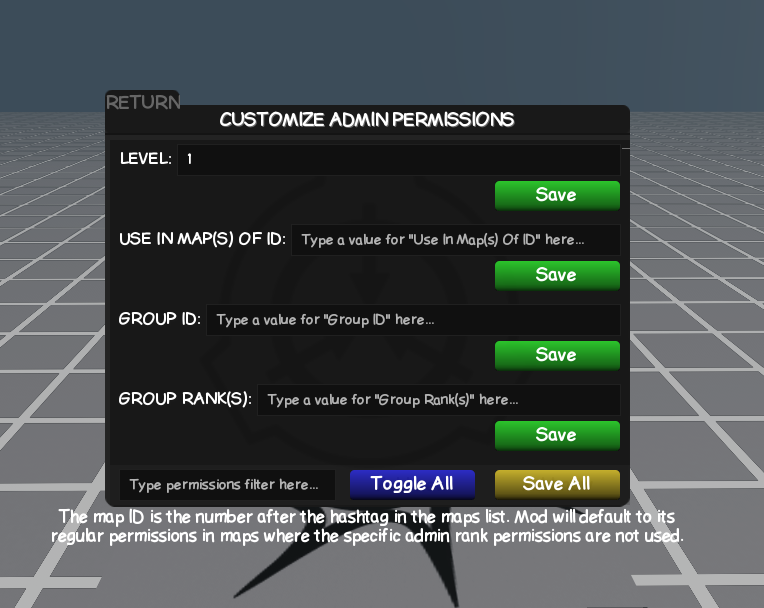
| Setting | Description |
|---|---|
Level |
Set the authority level of the rank (higher numbers are more powerful). |
Use in Maps of ID |
Restrict this rank to a specific map ID (found in the Map Tab). |
Group ID |
Assign this rank automatically to members of a specific Roblox Group. |
Group Ranks |
Specify which ranks within the group should receive this admin rank. |
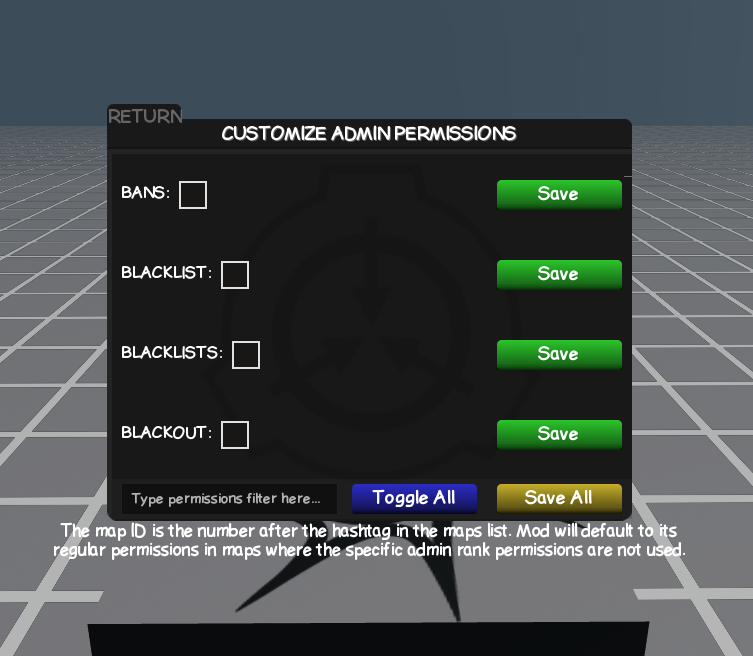
Below these settings, you will find a list of all available admin commands. You can enable or disable each command (e.g., Kick, ban, blacklist, announce, bring, morph) for every rank you create.
Teams Tab
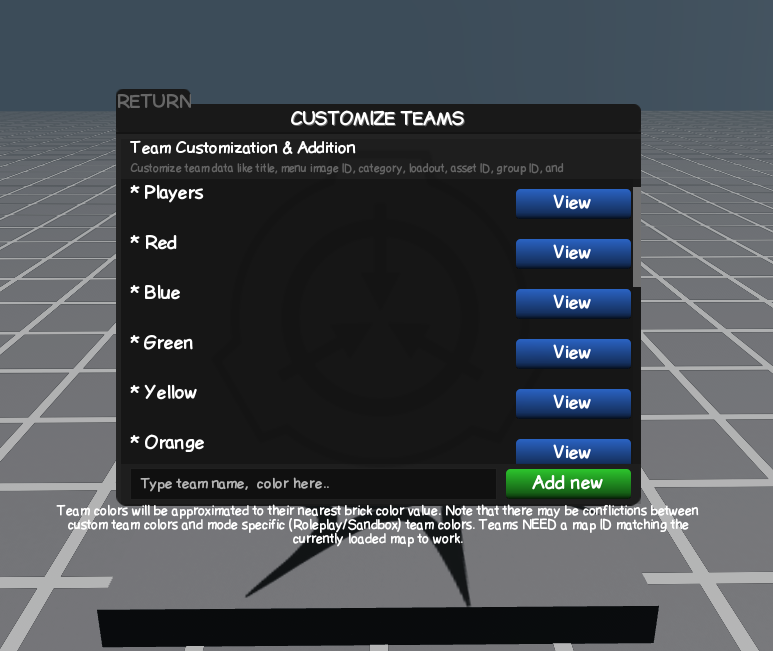
The Teams tab is where you can create and customize teams of your choice. The settings are mostly the same for Roleplay and Sandbox modes, but some additional options are available in Roleplay mode.
Sandbox Mode
Roleplay Mode
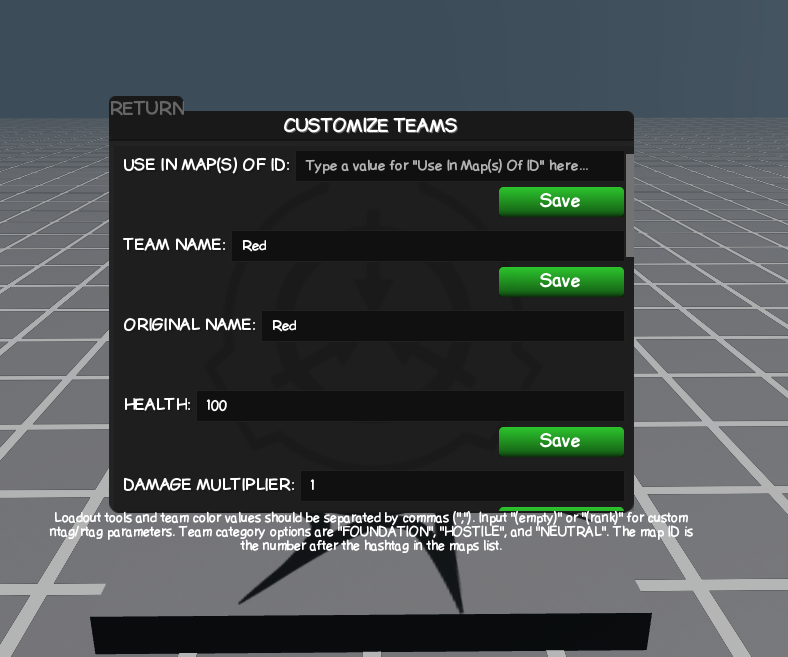
Team Settings
| Setting | Description |
|---|---|
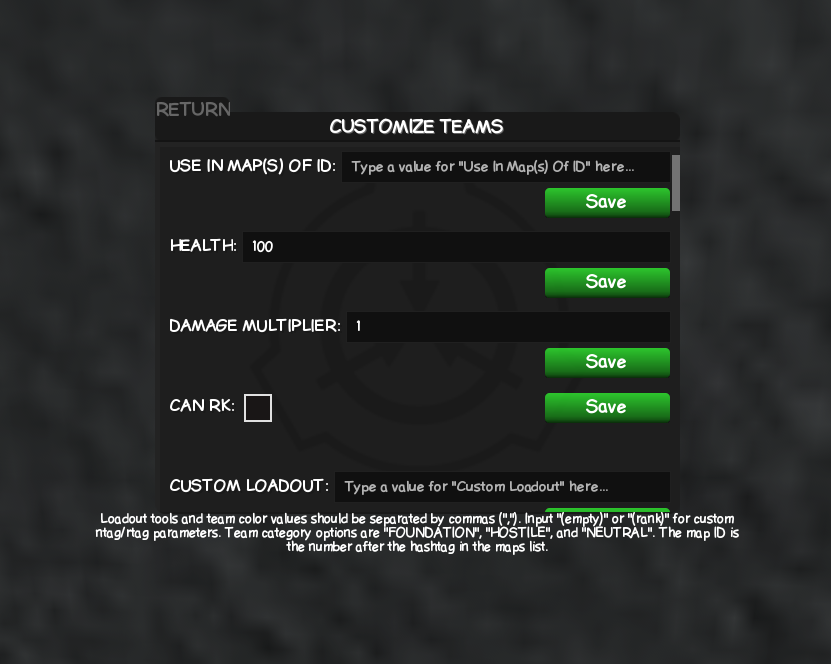
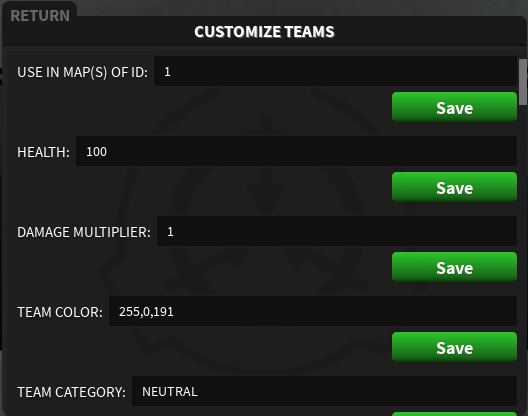
Use in Maps of ID |
Set what map you want this team to work in (Refer to the Map Tab to find your map ID). |
Team Name |
Change the name of the team. |
Original Name |
Just noting the original name. |
Health |
Set the value of how much health a player will have when on the team. |
Damage Multiplier |
Set the value of how much damage a player can do when on the team. |
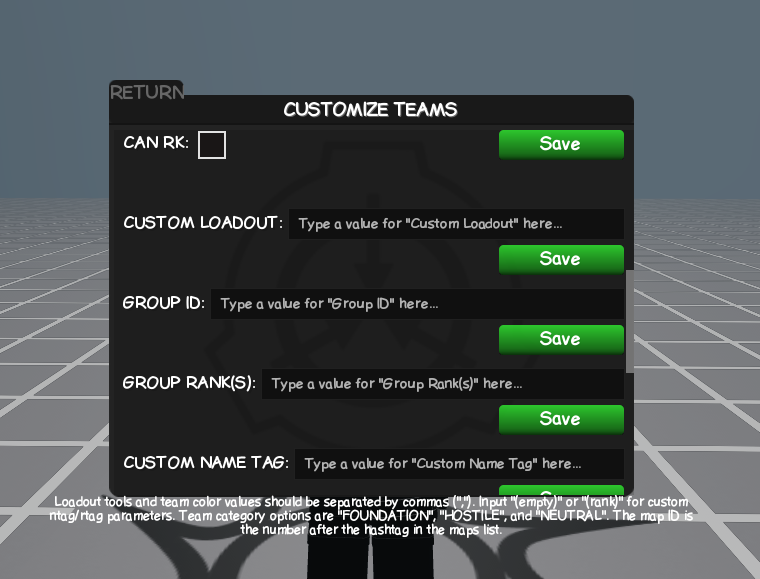
Can RK |
Enable or disable if the team can random kill anyone. |
Custom Loadout |
Set the teams loadout of what tools they spawn with. (E.g Level 3 Card, Glock, M4 = L3,glock,m4) |
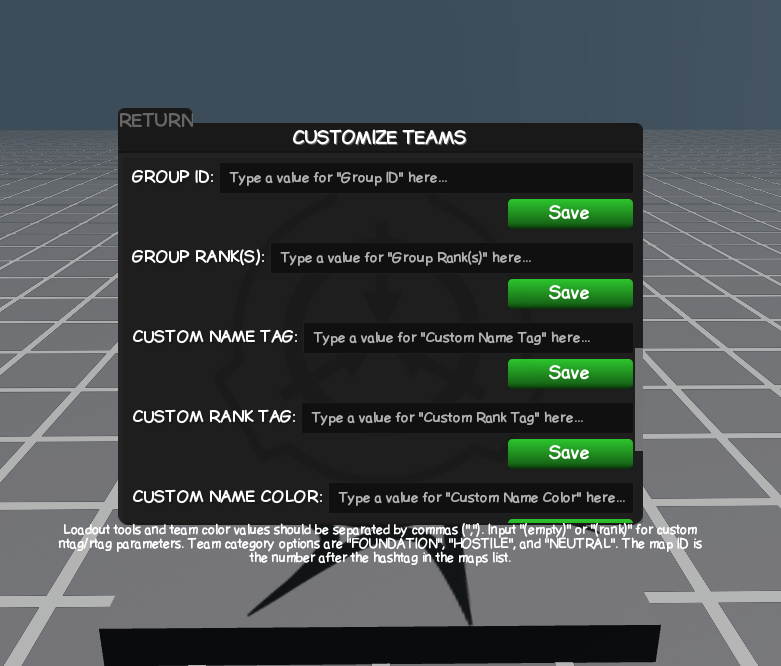
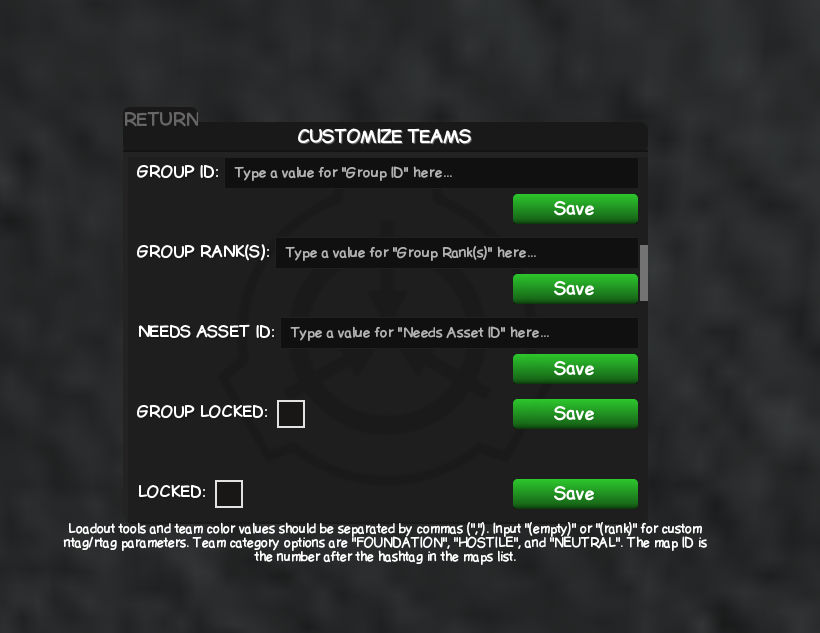
Group ID |
You can set a Roblox Group ID of who can join this team if they are in the specific group (If set, team will be locked to group only). |
Group Ranks |
You can set the rank they need in that specific group to join the team. |
Needs Asset ID Roleplay Only |
Players can only join this team if they own a specific asset like a shirt, pants, gamepass, etc. |
Group Locked Roleplay Only |
Only players in a specific group, using Group ID, can join the team. |
Locked Roleplay Only |
Enable or disable if the team is joinable or not. |
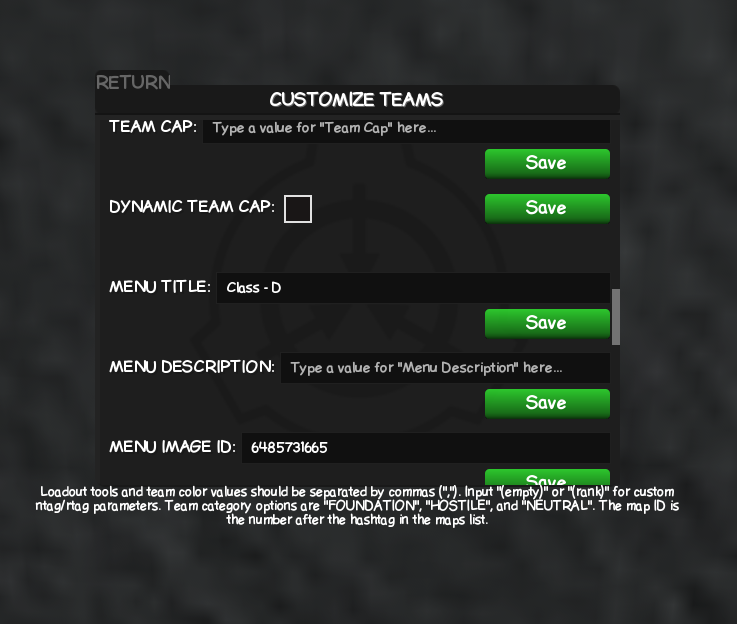
Team Cap Roleplay Only |
Set how many players can join the team. |
Dynamic Team Cap Roleplay Only |
Displays the amount of players on the team and its cap. |
Menu Title Roleplay Only |
Set the display name of the team when in the menu. |
Menu Description Roleplay Only |
Set a description in the team when in the menu. |
Menu Image ID Roleplay Only |
Set the image of the team when in the menu. |
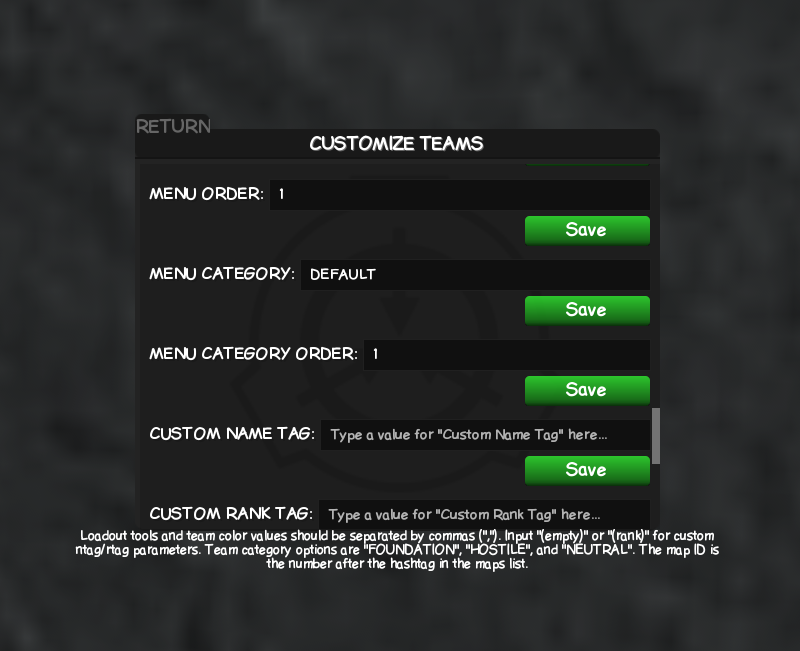
Menu Order Roleplay Only |
Set the order of the team where it displays in the menu. |
Menu Category Roleplay Only |
Set what the team falls under in regards to HOSTILE, FOUNDATION, NEUTRAL. |
Menu Category Order Roleplay Only |
Set the order of the team where it displays in that specific category it's under. |
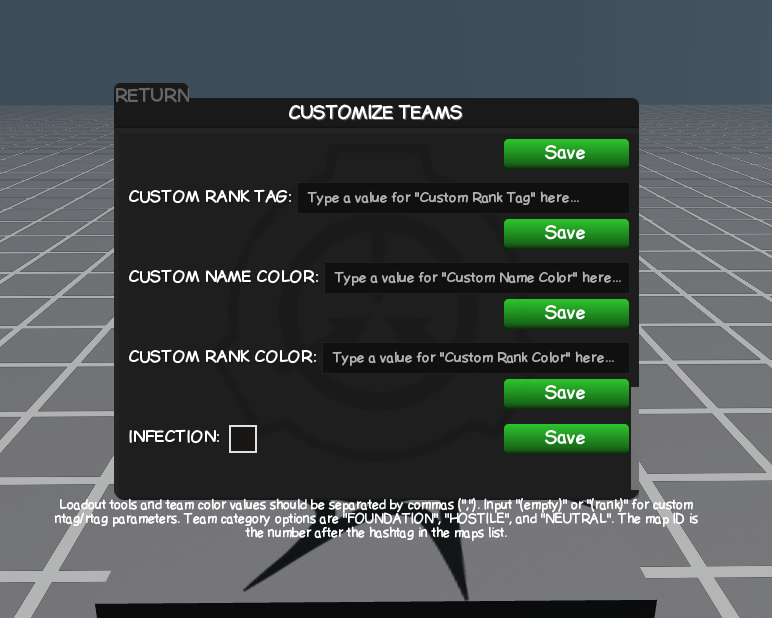
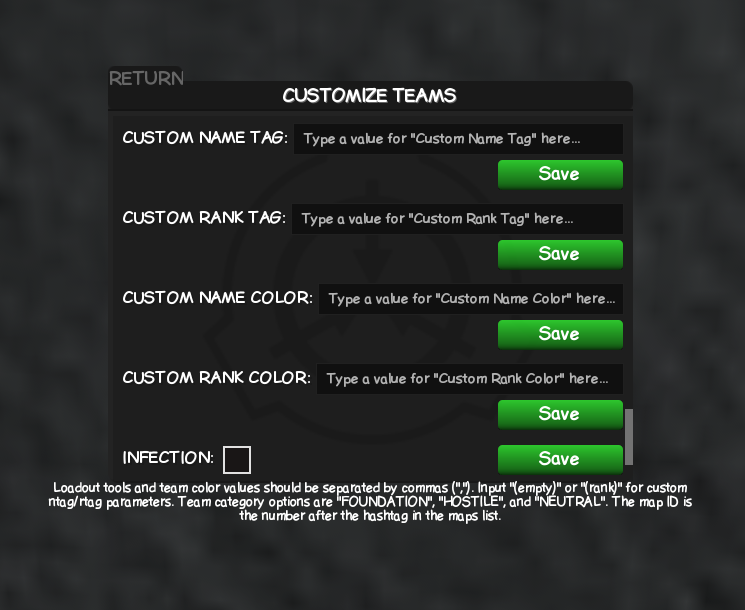
Custom Name Tag |
Set what name text the player will have when on the team. |
Custom Rank Tag |
Set what rank text the player will have when on the team. |
Custom Name Color |
Set the color of the name text (E.g Pink = 255 192 203). |
Custom Rank Color |
Set the color of the rank text (E.g Light Red = 255 182 193). |
Infection |
Enable or disable if players spawn with infection on the team. |
Infection Resistance |
Adjust a teams' resistance to infections like 008 or 409. This is a percentage value (0-100). |
Custom Chat Text Color |
Set the text color in chats |
Custom Chat Background Color |
Set the color of bubble color in chats |
How to create a team?
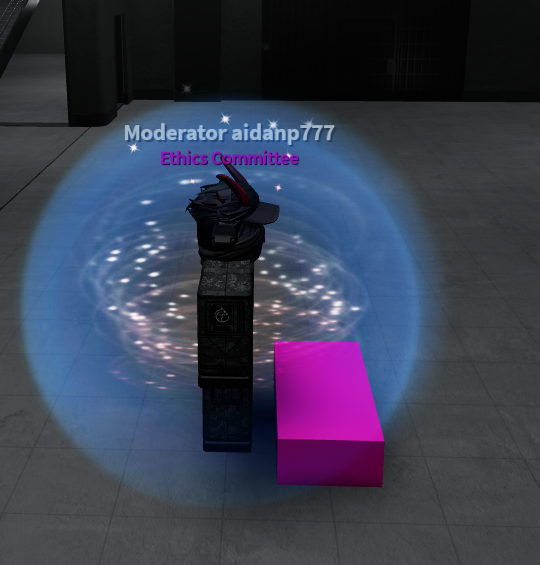
In order to create a team, for example, you want to create an Ethics Committee and make the team color pink.
Type in the text box:
Ethics Committee, 255,0,255Click Add New
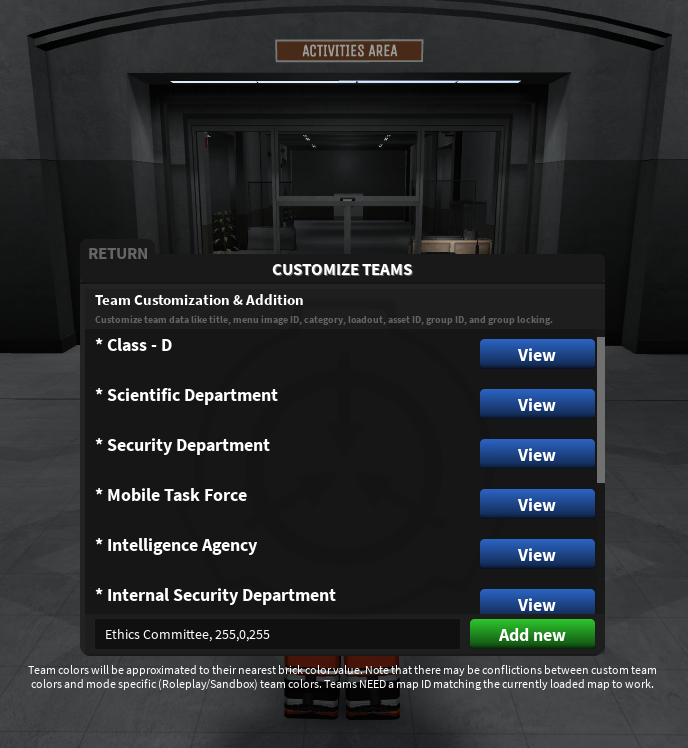
Now you will have your team. Click View

In order for the team to work, for example, Roleplay mode, you need to include a Map ID. (Refer to the Map Tab to find your map ID). Set the Map ID and Load your map.
Once you have loaded your map, you will see it in the menu.

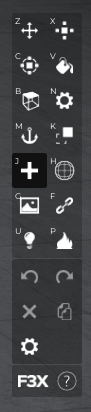
How do I make a spawn point?
- Open Btools (
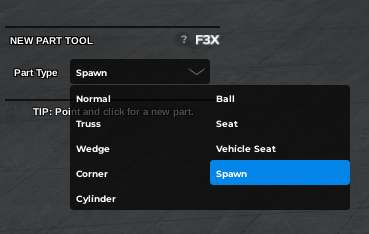
:btools). - Press J or click the + icon.
- Set Part Type to Spawn.
- Click anywhere to place the part.
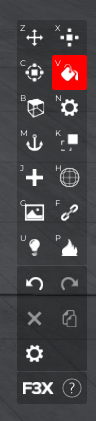
- Press V or click the Paint Bucket icon.
- On the left, you will see a Paint Palette, click on it so we can change the color.
- Team color is 255,0,191, so we will change our RGB numbers.
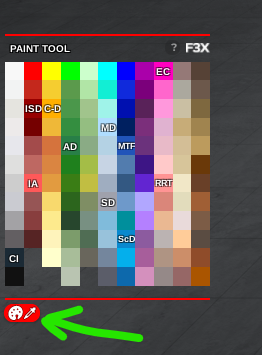
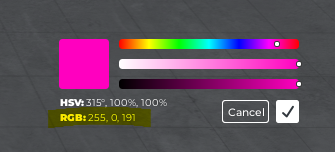
Now we have made our spawn point the color that matches the team.

Spawn as your team, and it should work!
Map Tab
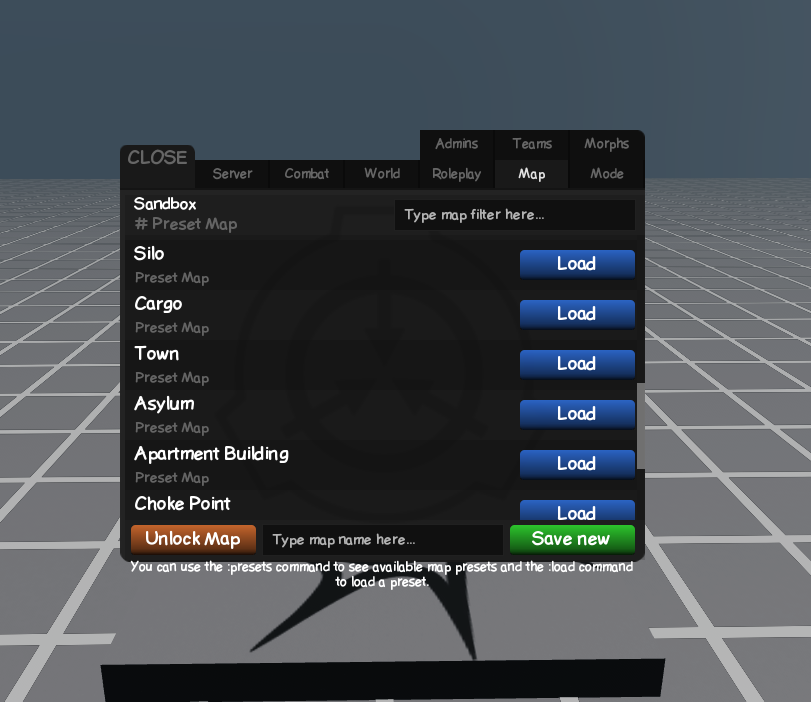
The Map Tab allows you to save, load, share, and delete maps. Your currently loaded map and any saved maps will appear here. When viewing the map tab, you will see preset maps and the current map at the top depending what mode you are in.
How can I edit the preset maps?
If you want to edit these maps and/or create more for your own, you need to click Unlock Map in order to edit the maps parts.
How can I name a map and save it?
If you want to save a map, you will type whatever you want to name your map in the bottom text tab (E.g CUSTOM SERVER TEST 1) then click Save New.
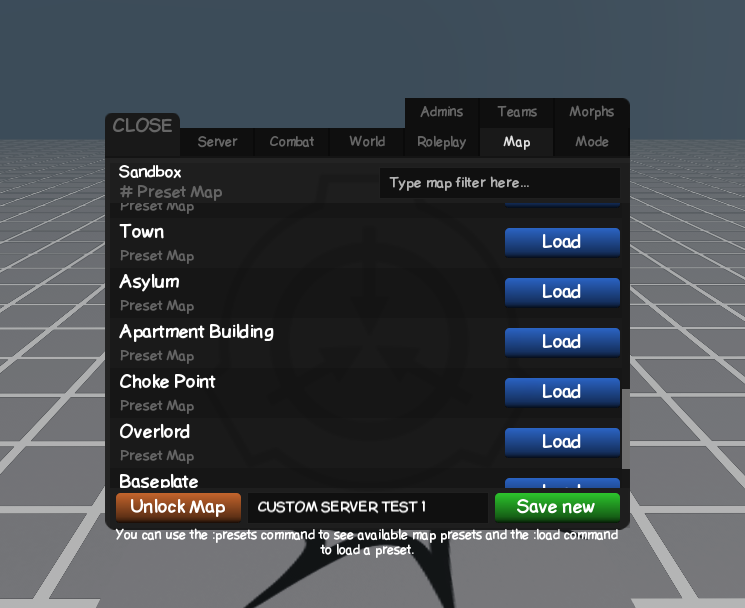
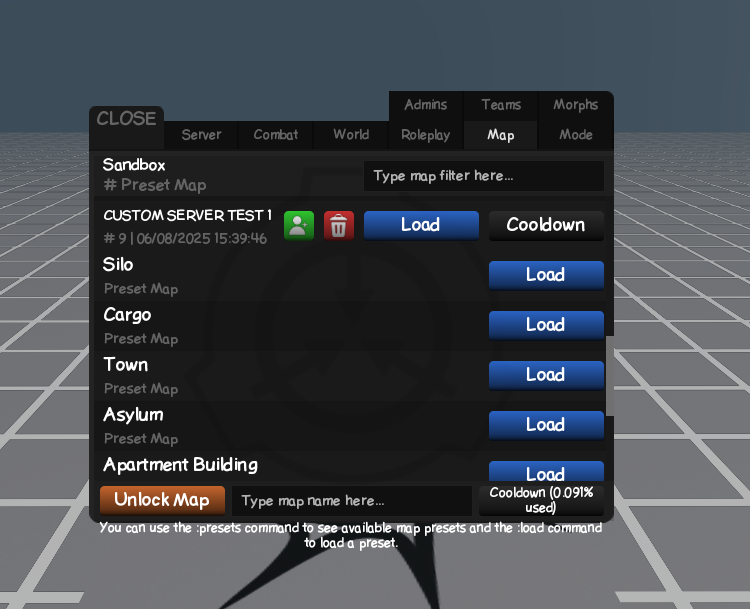
Now you have your own map. The percentage of how much you have used will display right after you save.
Under your map name:
- Map ID, Date of Creation & time
Your options:
- Share, Delete, Load, Overwrite (Save)
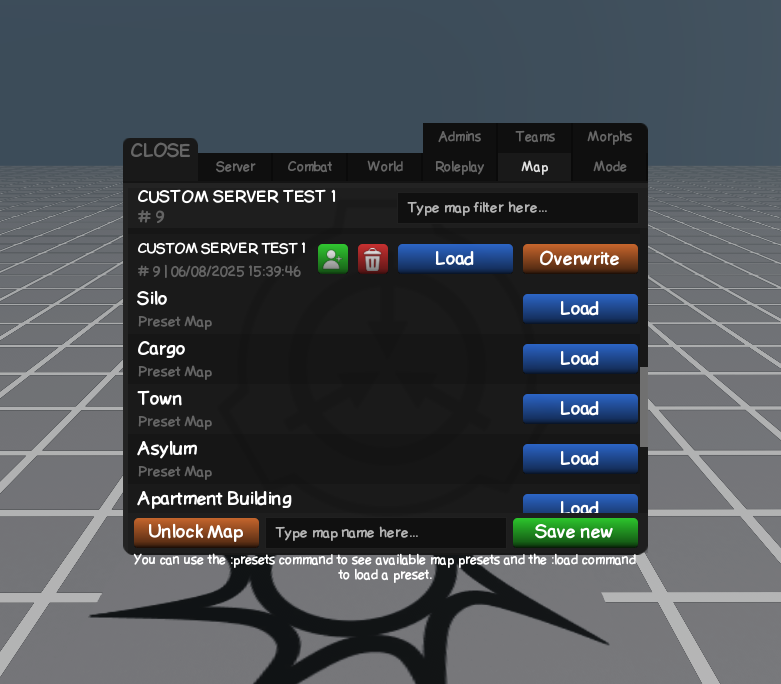
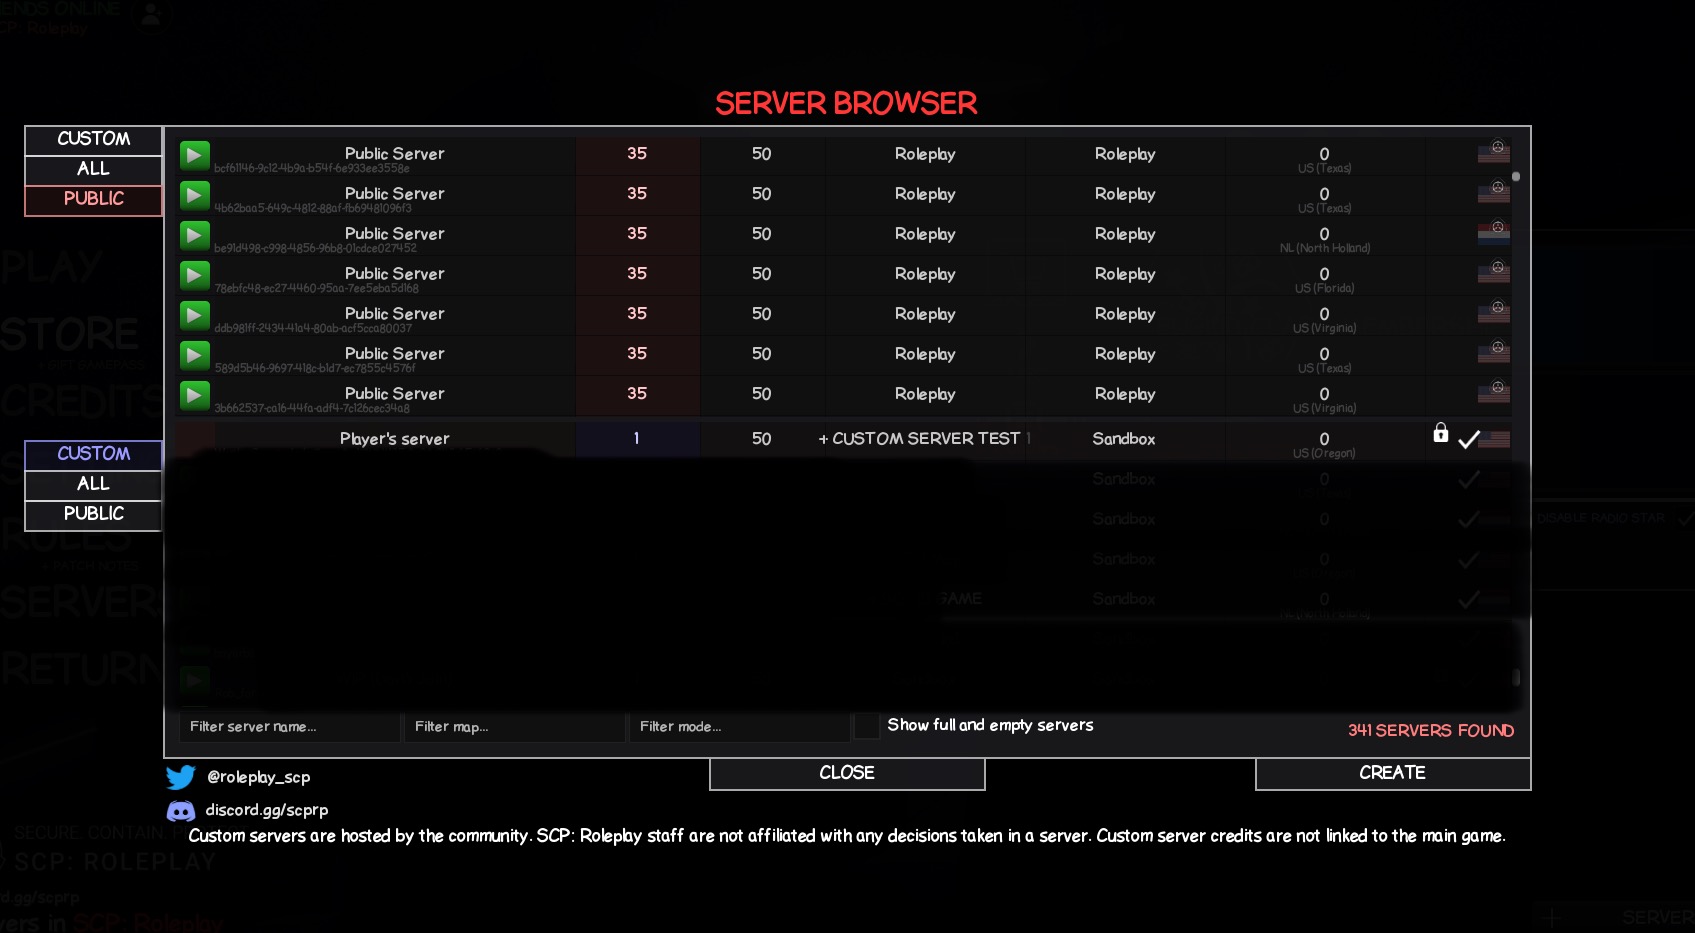
How can I display my map name on the servers list?
If you want to display your map name on the servers list, you need to click Load as you are still on the current preset map.
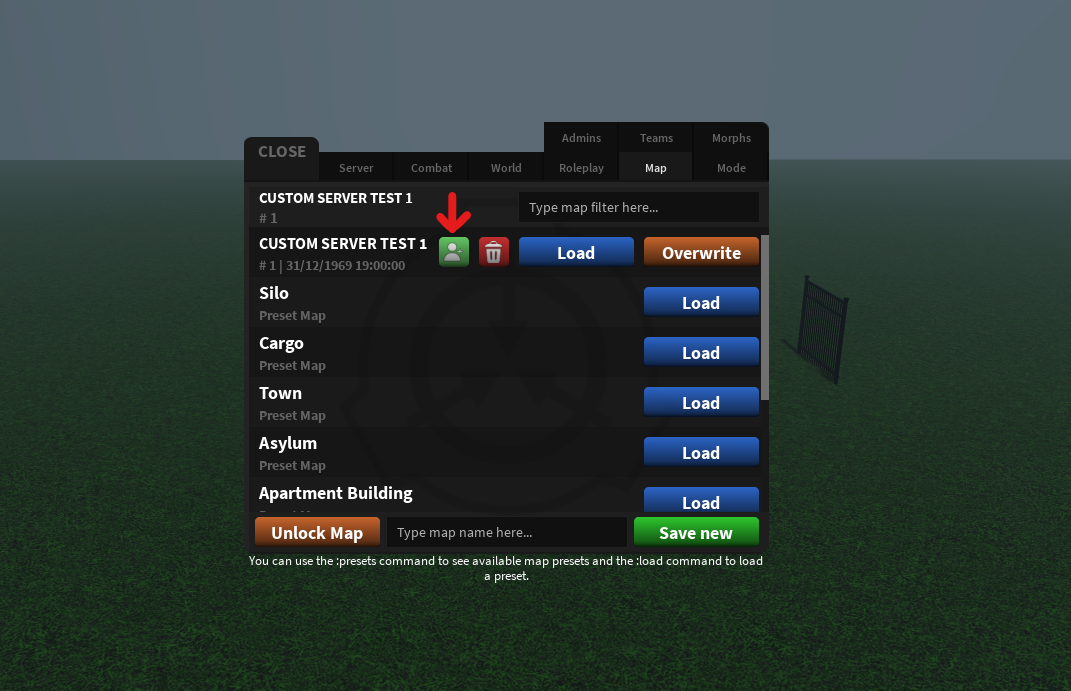
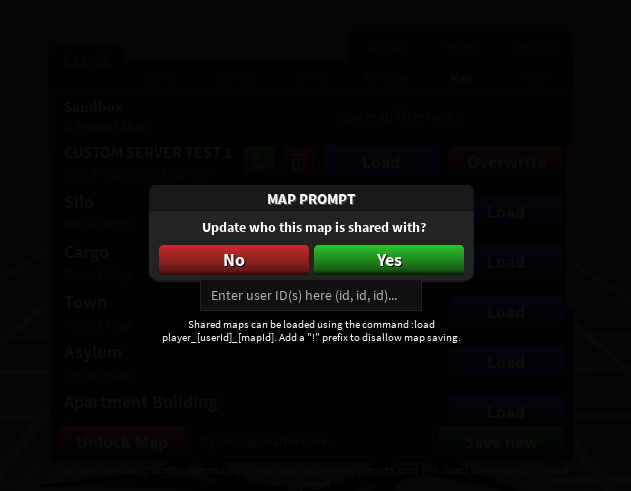
How can I share a map with someone?
- Click the green button beside your map name.
- You will then see the popup "MAP PROMPT".
- E.g aidanp777 (124271015) wants to share it with the user, Matt_Duseak (3065522820). Put 3065522820 in the text box below.
- Click YES
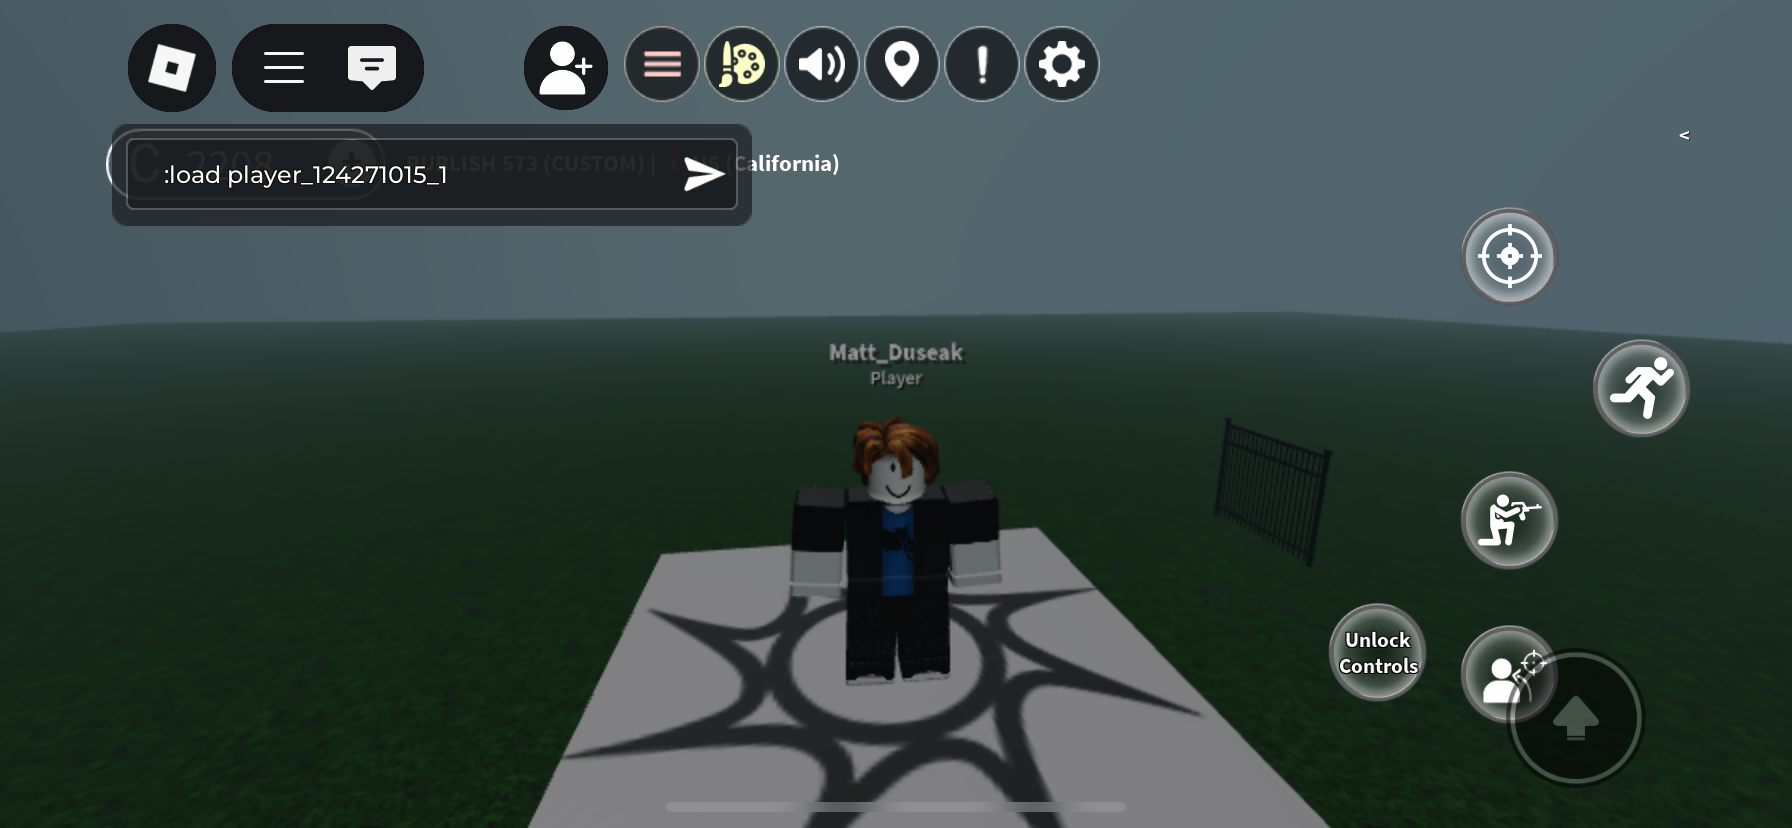
How can the player I shared the map with use it?
If the player wants to load said shared map, they need to do the following command:
:load player_124271015_1Format: player_(USER ID)_(MAP ID)
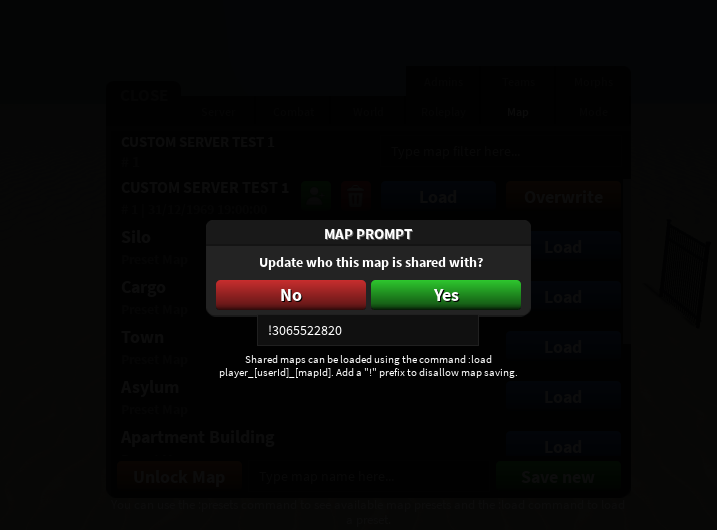
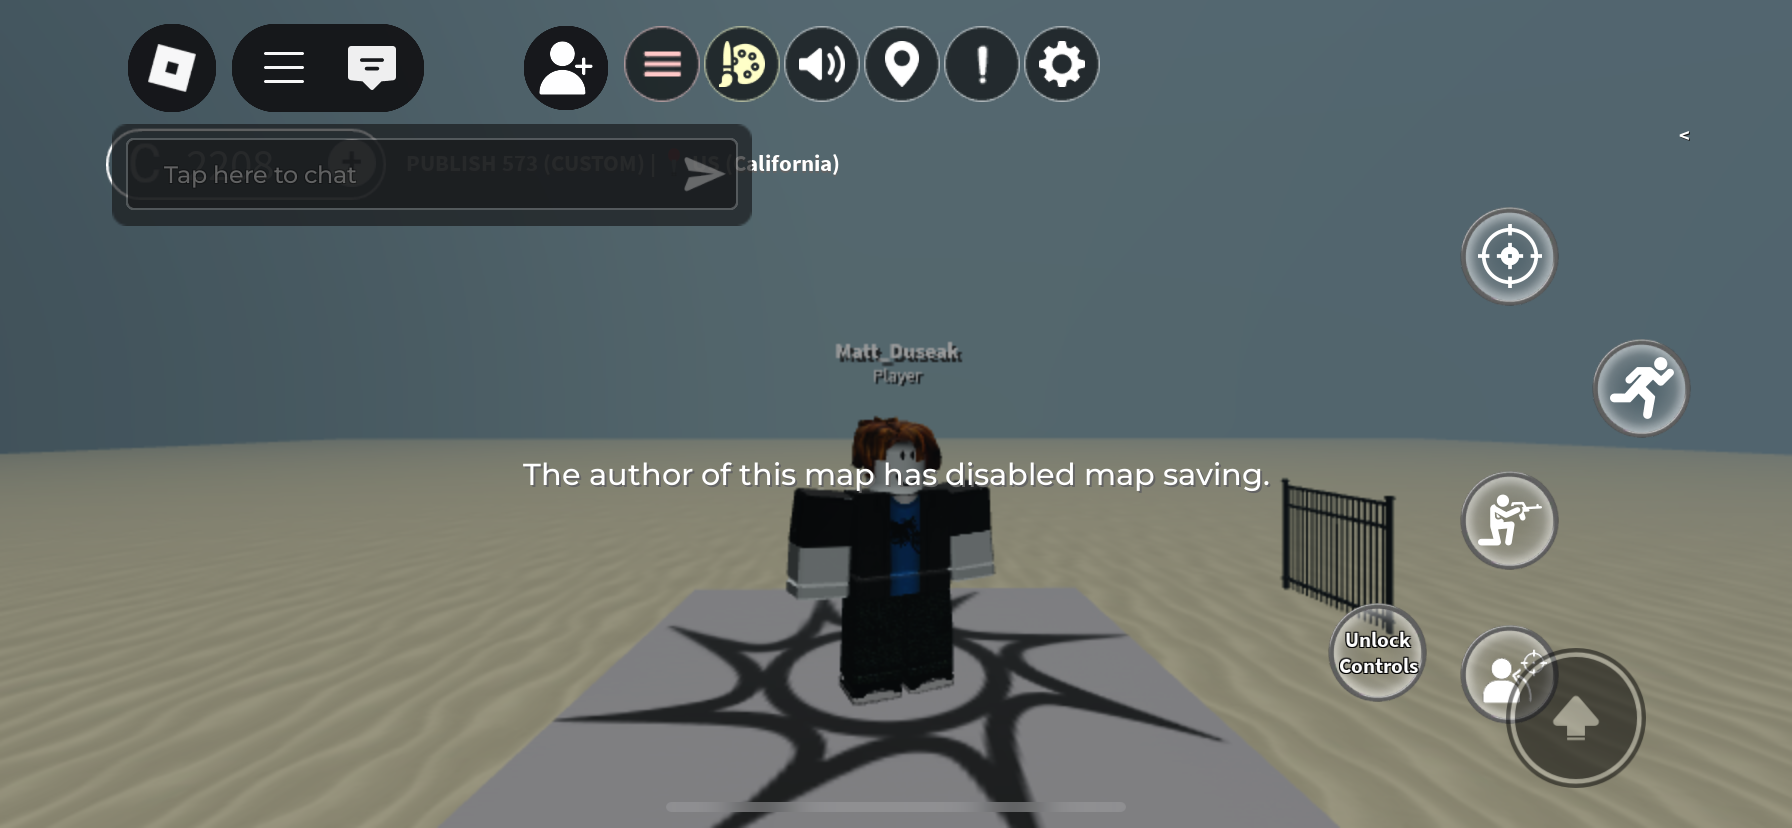
How can I make it so a player cannot save the map?
You need to add a "!" first, then add the player's ID.
Mode Tab
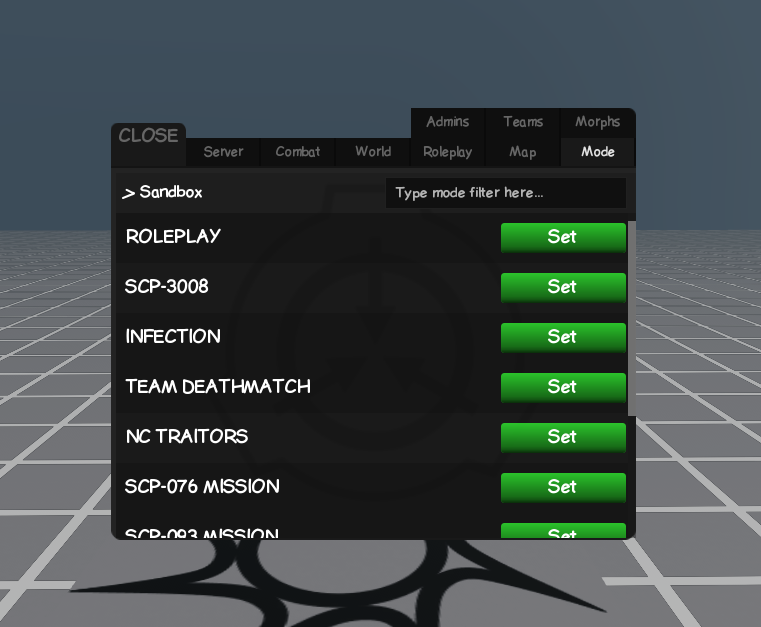
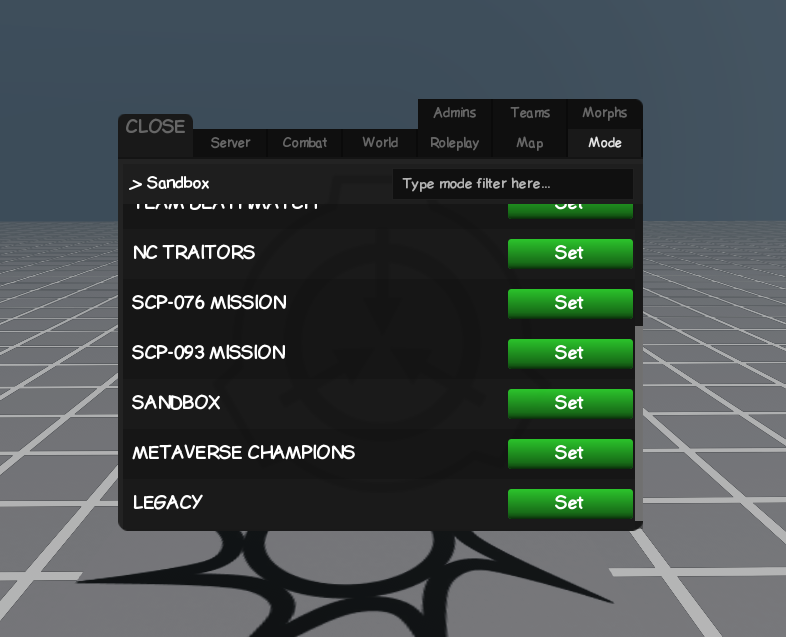
The Modes Tab allows you to change the server's active game mode. You are just setting your server to whatever mode you desire.
| Mode | Description |
|---|---|
| Roleplay | Set the server to Roleplay mode. |
| SCP 3008 | Set the server to the SCP 3008 mode, consists of building and surviving the waves. |
| Infection | Set the server to infection mode, basically players vs zombies. |
| Team Deathmatch | Set the server to a Team Deathmatch mode, you can also choose any map you desire. |
| NC Traitors | Set the mode to NC Traitors, you are to find out who the traitor is by majority vote and discussions. |
| SCP 076 Mission | Set the server to SCP 076 Mission mode, you are to take down 076 in an arena. |
| SCP 093 Mission | Set the server to SCP 093 Mission, you are to battle your way through to the house and achieve the special item alive. |
| Sandbox | Set the server to a Sandbox mode, pretty straightforward. |
| Metaverse Champions | Set the server to Metaverse Champions mode, battle your way through a zombie infected facility and save your high intelligent Scientist. |
| Legacy | Set the server to Legacy mode, experience the 2020 era of SCP: Roleplay. |